C# Programming

A passionate self-taught .Net developer from India. Focuses on ASP.Net | ASP.Net Core | .Net & C# advance design, best practices & experiences to make developer

Learn how to ignore properties based on numerous measures with System.Text.Json.

Learning Objectives

When serializing C# objects to JSON using “ System.Text.Json ,” all public properties by default serialized. If you don’t want a few of them to appear in the result, there are several options.

The article demonstrates how to ignore

  • Individual properties

  • A null-value properties

  • All read-only properties

  • All null-value properties

  • All default-value properties

Prerequisites

  • Install latest visual studio community edition.

  • Knowledge of properties in C# language.

Getting Started

The System.Text.Json namespace renders functionality for serializing to and deserializing from JSON.

Ignore Individual Properties

Use the [JsonIgnore] attribute to ignore particular property. Here’s an example class to serialize and JSON output:

public class Example{ public string Property1 { get; set; } [JsonIgnore] public string Property2 { get; set; } }

JSON Output

{ "Property1":"Value1"}

Ignore Null Value Properties

Option to specify condition with [JsonIgnore] attribute’s property. The JsonIgnoreCondition enum provides the following options:

  • Always — The property is always ignored. If no Condition is specified, this option is assumed.

  • Never — The property is always serialized and deserialized, regardless of the DefaultIgnoreCondition , IgnoreReadOnlyProperties , and IgnoreReadOnlyFields global settings.

  • WhenWritingDefault — The property is ignored on serialization if it’s a reference type null, a nullable value type null, or a value type default.

  • WhenWritingNull — The property is ignored on serialization if it’s a reference type null or a nullable value type null.

[JsonIgnore(Condition = JsonIgnoreCondition.Always)]

The following example demonstrates the usage of the [JsonIgnore] attribute’s Condition property:

public class Example{ [JsonIgnore(Condition = JsonIgnoreCondition.WhenWritingDefault)] public DateTime Date { get; set; }

[JsonIgnore(Condition = JsonIgnoreCondition.Never)] public int TempC { get; set; }

[JsonIgnore(Condition = JsonIgnoreCondition.WhenWritingNull)] public string? Summary { get; set; }};

Ignore read-only properties

A read-only property, i.e., it contains a public getter but not a setter. To ignore all those properties, set the JsonSerializerOptions. IgnoreReadOnlyProperties to true, as shown in the below example.

var options = new JsonSerializerOptions { IgnoreReadOnlyProperties = true, WriteIndented = true };

Serialization Use

jsonString = JsonSerializer.Serialize(classObject, options);

This option affects only serialization. While deserialization, read-only properties are neglected by default.

Ignore all null-value Properties

To neglect each null-value property, set the DefaultIgnoreCondition property to WhenWritingNull , as explained in the following example:

JsonSerializerOptions options = new(){ DefaultIgnoreCondition = JsonIgnoreCondition.WhenWritingNull };

Serialization Use

jsonString = JsonSerializer.Serialize(classObject, options);

Ignore all default-value Properties

To counter serialization of default values in properties, set the DefaultIgnoreCondition property to WhenWritingDefault , as shown below.

JsonSerializerOptions options = new(){ DefaultIgnoreCondition = JsonIgnoreCondition.WhenWritingDefault };

Serialization Use

jsonString = JsonSerializer.Serialize(classObject, options);

Thank you for reading, and I hope you liked the article.

Stay tuned on C

C# Publication, LinkedIn, Instagram, Twitter, Dev.to, Pinterest, Substack, Wix.

Buy Me A Coffee

How to start mining dogecoins with your laptop hash.

Dogecoin began as a joke on the Internet approximately seven years ago by two developers Billy Markus and Jackson Palmer. Today it doesn’t appear to be a joke with a market cap of over 6 billion dollars.

Software for Mining

Step 1

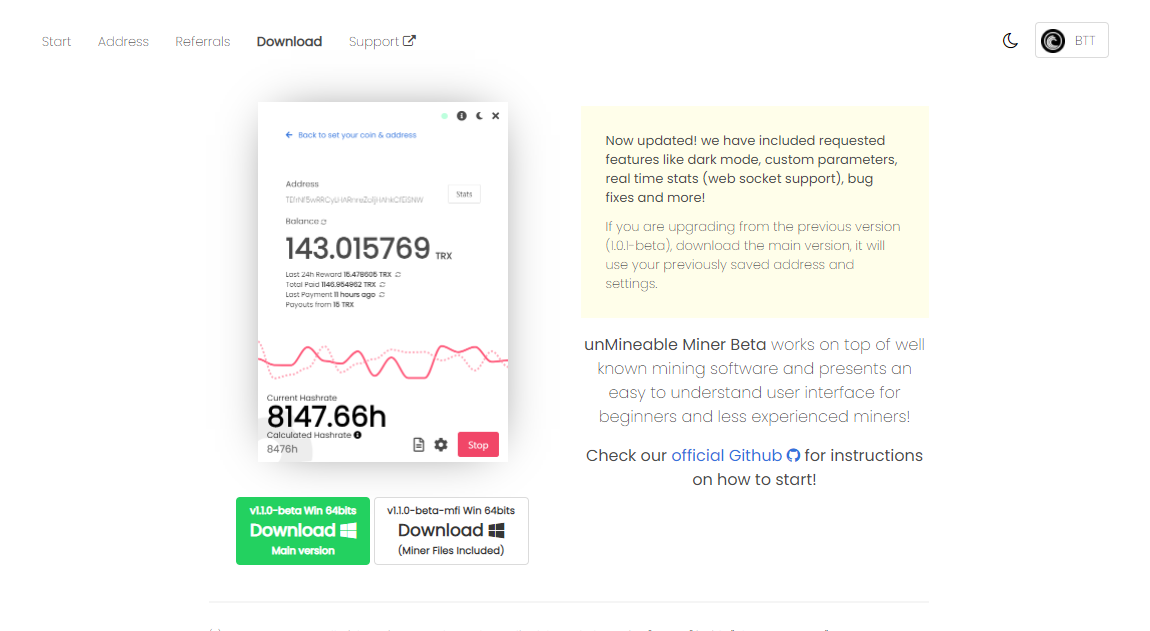
Visit the **Unmineable** website and download the windows software as shown below.

Step 2

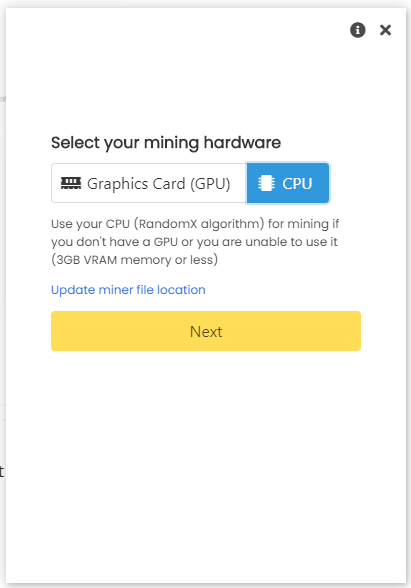
Extract and run the software. Click continue, and there are two options available to mine Doge and many other coins.

  • **Graphics Card(GPU)– **mine coins at a higher speed

  • CPU– relatively slower

The article demonstrates mining using the “CPU” option.

Step 3

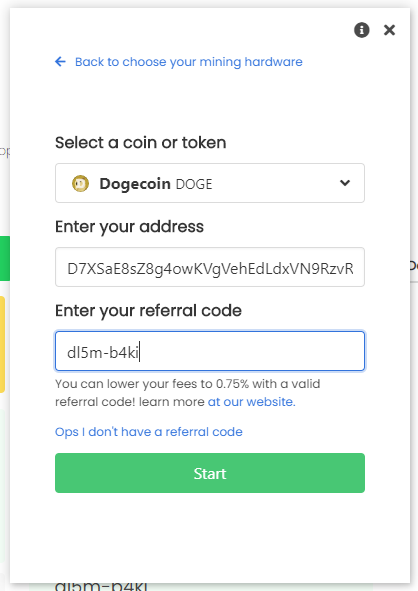
Select coin and input the wallet address and referral code.

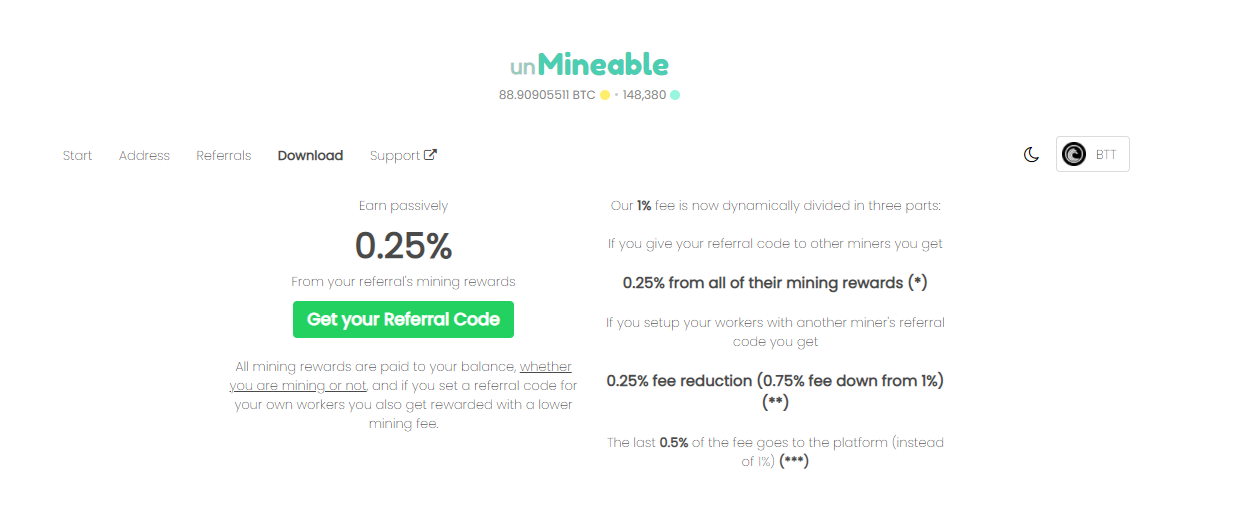
Referral code: “dl5m-b4ki”. It helps in a discount mining fees. Supported algorithms: Ethash, Etchash, RandomX, and KawPow.

1% mining fee for all coins. Earn passive rewards and get a lower fee by using our referral system!

Address: Can be a hard wallet or an exchange wallet address

Step 4

Click start, and it will begin mining the particular coin.

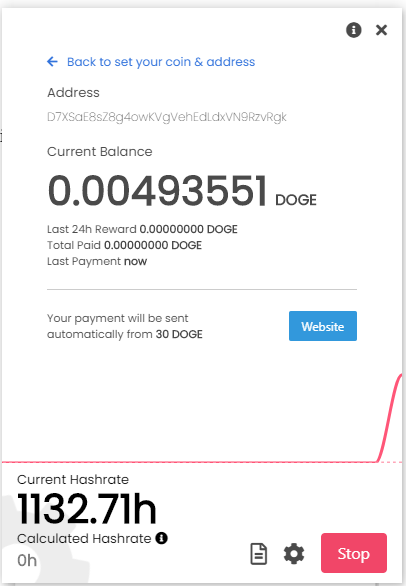
> # “Within 1 hr, I can mine the above-shown doge coins, and with a higher hash rate, it's much faster”

Summary

  • Once you mined 30 doge coins, it's transferrable to the wallet address.

  • Click on the website button to see the progress on the unMineable website.

  • You can control the mining intensity from the setting icon.

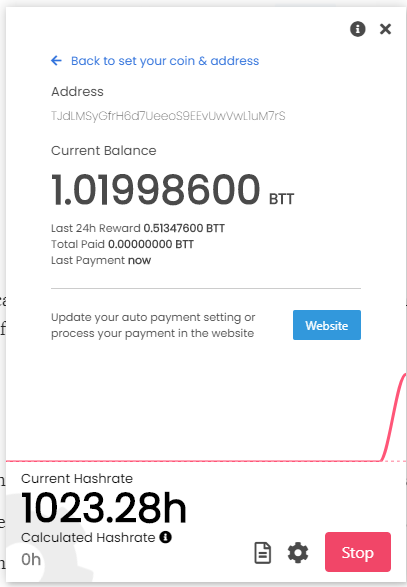
BitTorrent Token Mining Statistics

Thanks for reading and I hope you like the article. Comment if you need any help.

Follow me on

C# Publication, LinkedIn, Instagram, Twitter, Dev.to, Pinterest, Substack, Wix.
Buy Me A Coffee

Design Pattern – Observer

According to Gang of Four, observer pattern defines dependency b/w two or more objects. So when one object state changes, then all its dependents are notified.

Photo by [Christina Morillo](https://www.pexels.com/@divinetechygirl?utm_content=attributionCopyText&utm_medium=referral&utm_source=pexels) from [Pexels](https://www.pexels.com/photo/person-using-macbook-pro-on-person-s-lap-1181298/?utm_content=attributionCopyText&utm_medium=referral&utm_source=pexels)

In other words, a change in one object initiates the notification in another object.

Use Case

Let’s take an example of an Instagram celebrity influence who has “x” number of followers. So the moment the celebrity adds a post, then all the followers are notified.

Let us implement the aforementioned use case using Observer Design Pattern.

Prerequisites

  • Basic knowledge of OOPS concepts.

  • Any programming language knowledge.

The article demonstrates the usage of observer design patterns using the C# programming language. So, to begin with, C# Introduction to C# C# has been around for quite some period, and it continues to develop, obtaining more enhanced features.medium.com

Learning Objectives

  • How to code using an observer design pattern?

Getting Started

According to the use case, the first implement an interface that contains what actions a celebrity can perform. It is known as “Subject.”

    public interface ICelebrityInstagram{
     string FullName { get; }
     string Post { get; set; }
     void Notify(string post);
     void AddFollower(IFollower fan);
     void RemoveFollower(IFollower fan);
    }

The Subject contains the following member functions.

  • Notify: To notify all the followers.

  • AddFollower: Add a new follower to the celebrity list.

  • RemoveFollower: Remove a follower from the celebrity list.

Now implement the **observer **“IFollower” interface, which contains the “Update” member function for notification.

    public interface IFollower{
     void Update(ICelebrityInstagram celebrityInstagram);
    }

Finally, it's time to implement “Concrete Implementation” for both “Subject” and “Observer.”

ConcreteObserver named “Follower.cs”

It provides an implementation of the Update member function, which outputs the celebrity name & post to the console.

https://gist.github.com/ssukhpinder/c98ce6c8c56113f6335a34f9782a3f49

ConcreteSubject named “Sukhpinder.cs”

https://gist.github.com/ssukhpinder/da667168bdc1f77333a201c87abd6b78

How to use observer pattern?

The following use case shows that whenever the below statement is executed sukhpinder.Post = “I love design patterns.”; the Update method is triggered for each follower, i.e., each follower object is notified of a new post from “Sukhpinder.” https://gist.github.com/ssukhpinder/78c9f9c7986b4b006a0d5eb48afcb1de

Output

Github Repo

The following repository shows the above use case implementation using an Observer Design Pattern in the console-based application. ssukhpinder/ObserverPattern

Thank you for reading, and I hope you liked the article. Please provide your feedback in the comment section.

Follow me on

C# Publication, LinkedIn, Instagram, Twitter, Dev.to, Pinterest, Substack, Wix.
More design patterns

Design Pattern — Abstract Factory According to Gang of Four, abstract factory patterns can be assumed as the factory for creating factories.medium.com Design Pattern — Factory Method According to the Gang of Four, the factory method allows the subclass to determine which class object should be…medium.com Design Pattern — Singleton Gang of Four — Singleton design pattern ensures that a particular class has only one instance/object and a global…medium.com Design Pattern — Decorator Pattern According to Gang of Four, the pattern adds extra responsibilities to a class object dynamically.medium.com Design Pattern – Iterator According to Gang of Four, the iterator pattern provides a process to obtain the aggregator object without knowing its…medium.com

Design Pattern – Observer

According to Gang of Four, observer pattern defines dependency b/w two or more objects. So when one object state changes, then all its dependents are notified.

Photo by [Christina Morillo](https://www.pexels.com/@divinetechygirl?utm_content=attributionCopyText&utm_medium=referral&utm_source=pexels) from [Pexels](https://www.pexels.com/photo/person-using-macbook-pro-on-person-s-lap-1181298/?utm_content=attributionCopyText&utm_medium=referral&utm_source=pexels)

In other words, a change in one object initiates the notification in another object.

Use Case

Let’s take an example of an Instagram celebrity influence who has “x” number of followers. So the moment the celebrity adds a post, then all the followers are notified.

Let us implement the aforementioned use case using Observer Design Pattern.

Prerequisites

  • Basic knowledge of OOPS concepts.

  • Any programming language knowledge.

The article demonstrates the usage of observer design patterns using the C# programming language. So, to begin with, C# Introduction to C# C# has been around for quite some period, and it continues to develop, obtaining more enhanced features.medium.com

Learning Objectives

  • How to code using an observer design pattern?

Getting Started

According to the use case, the first implement an interface that contains what actions a celebrity can perform. It is known as “Subject.”

public interface ICelebrityInstagram{ string FullName { get; } string Post { get; set; } void Notify(string post); void AddFollower(IFollower fan); void RemoveFollower(IFollower fan); }

The Subject contains the following member functions.

  • Notify: To notify all the followers.

  • AddFollower: Add a new follower to the celebrity list.

  • RemoveFollower: Remove a follower from the celebrity list.

Now implement the **observer **“IFollower” interface, which contains the “Update” member function for notification.

public interface IFollower{ void Update(ICelebrityInstagram celebrityInstagram); }

Finally, it's time to implement “Concrete Implementation” for both “Subject” and “Observer.”

ConcreteObserver named “Follower.cs”

It provides an implementation of the Update member function, which outputs the celebrity name & post to the console.

gist https://gist.github.com/ssukhpinder/c98ce6c8c56113f6335a34f9782a3f49

ConcreteSubject named “Sukhpinder.cs”

gist https://gist.github.com/ssukhpinder/da667168bdc1f77333a201c87abd6b78

How to use observer pattern?

The following use case shows that whenever the below statement is executedsukhpinder.Post = “I love design patterns.”; the Update method is triggered for each follower, i.e., each follower object is notified of a new post from “Sukhpinder.”

gist https://gist.github.com/ssukhpinder/78c9f9c7986b4b006a0d5eb48afcb1de

Output

Github Repo

The following repository shows the above use case implementation using an Observer Design Pattern in the console-based application. ssukhpinder/ObserverPattern How to use observer design pattern in .Net. Contribute to ssukhpinder/ObserverPattern development by creating an…github.com

Thank you for reading, and I hope you liked the article. Please provide your feedback in the comment section.

Follow me on

C# Publication, LinkedIn, Instagram, Twitter, Dev.to, Pinterest, Substack, Wix.
More design patterns

Design Pattern — Abstract Factory According to Gang of Four, abstract factory patterns can be assumed as the factory for creating factories.medium.com Design Pattern — Factory Method According to the Gang of Four, the factory method allows the subclass to determine which class object should be…medium.com Design Pattern — Singleton Gang of Four — Singleton design pattern ensures that a particular class has only one instance/object and a global…medium.com Design Pattern — Decorator Pattern According to Gang of Four, the pattern adds extra responsibilities to a class object dynamically.medium.com Design Pattern – Iterator According to Gang of Four, the iterator pattern provides a process to obtain the aggregator object without knowing its…medium.com

Microsoft has launched a newer syntax for switch expressions starting from C# 8.0. Switch statements must produce a value in each of its case blocks. Switch expressions allow us to use extra compact expression syntax.

With new syntax are fewer repetitive “cases and break” keywords and fewer “curly braces.”

As an example, consider the following enum with a collection of the colors:

public enum Color {

	Red,     
	Orange,     
	Yellow,     
	Green,     
	Blue,     
	Indigo,     
	Violet

}

Old switch syntax

switch (c)
{
  case Color.Red:
	  Console.WriteLine("The color is red");
	  break;
  default:
	  Console.WriteLine("The color is unknwn.");
	  break;
}

gist https://gist.github.com/ssukhpinder/33f204f3fda8ab97326b2b06a091405d

New switch syntax advantages

  • The variable name comes before the switch keyword starting syntax.

  • The distinctive order makes it simple to recognize the switch expression from the switch statement.

  • The “case” and “:” elements replaced with =>.

  • The default case is replaced with a “_” character.

Thank you for reading. Keep visiting and share this in your network. Please put your thoughts and feedback in the comments section.

Follow on following channels to stay tuned on upcoming stories on C#

C# Publication, LinkedIn, Instagram, Twitter, Dev.to, Pinterest, Substack, Wix

Learn to analyze .Net applications using NDepend.

Learning Objectives

- How to use NDepend to analyze .Net Assemblies

- Dashboard report features.

- How Dependency Graph helps to improve code architecture and maintainability.

Prerequisites

- First, Install the latest Visual Studio here.

- Download NDepend Trail Edition here

- Unzip the download and install the VS extension

Official Documentation for more info

Getting Started

Post-installation, to attach the code analyzer to any .Net application is just a “2-step process”.

Step 1: Open any .Net project in Visual Studio and click on the below icon and start analyzing the code assemblies.

Step 2: Click “Analyze a .Net Assembly.”

Dashboard View Features

The favorite part is the dashboard report. It provides lots of information in a single view that helps a lot.

There are two choices to view the report as given below:

1. An HTML report is generated and opened in a different Tab on the default browser.

2. A new dashboard tab will open in Visual Studio itself.

I personally prefer option 2 because it redirects to me the exact line of code or file where rules are violated.

Dashboard Features

Debt v/s Rating

Let us understand how the .Net Assembly is rated “A.”

The rating depends upon the “Debt Percentage,” and Debt is calculated based upon calculated technical debt compared to the number of code lines required to re-write the code from scratch.

- If Debt lies between 0 to 5%, it's Rated “A.”

- If Debt lies between 5 to 10%, it's Rated “B.”

- If Debt lies between 10 to 20%, it's Rated “C.”

- If Debt lies between 20 to 50%, its Rated “D.”

- If Debt is more than 50%, it's Rated “E.”

View Debt per file

Click on the rating alphabet, and the tool shows the debt per file.

The most valuable part, one can choose to export the above categorization into various file formats like HTML, Excel(a personal favorite), etc.

The ultimate use case is

- To dump the breakdown into an excel sheet and export it to JIRA to create tasks or user stories.

- Using debt information for estimation.

- Using the debt grade of each file as a priority.

Improve Code Architecture & Maintainability

- Dependency Graph helps understanding code by visualizing its architecture.

- It helps redesign the regions where code health & structuring is poor.

- It also helps in protecting the codebase against future shortcomings with improved and optimized architecture.

What is a Dependency Graph?

Dependency Graph shows errors, potential obstacles, and code smells. It helps to expose bugs that the codebase may be trying to protect.

A dependency graph consists of the following components

- assemblies

- namespaces

- types or members

How to view the dependency graph with NDepend?

Users can export/view anything to a dependency graph. The best way to view is just right-clicking on any “.cs” file and choose “Show on Dependency Graph,” as shown below.

The particular file will be highlighted in the graph as shown below. Personally, it helps me visualize how deeply the class file is linked.

Dependency Graph of .Net Core application with more than 10k+ lines of code. I find the tool really powerful to graphically represent such a huge codebase within 2–3 seconds. Well done, NDepend..!!

Thank you for reading, and I hope you liked the article. Please provide your feedback in the comment section.

Stay tuned for more posts on Code Analysis with NDepend.

Follow me on Medium | BuyMeACoffee